

How to Install the Ventray Max 120 Juicer
Putting together the Ventray Max 120 Juicer isn’t hard, but it needs a bit of attention to get it right. This guide runs through the parts, how to assemble everything, how to use the thing, and how to take it apart for a good scrub. Follow these steps, and fresh juice will be ready in no time.
Parts Diagram
Here’s the rundown of what’s in the box:
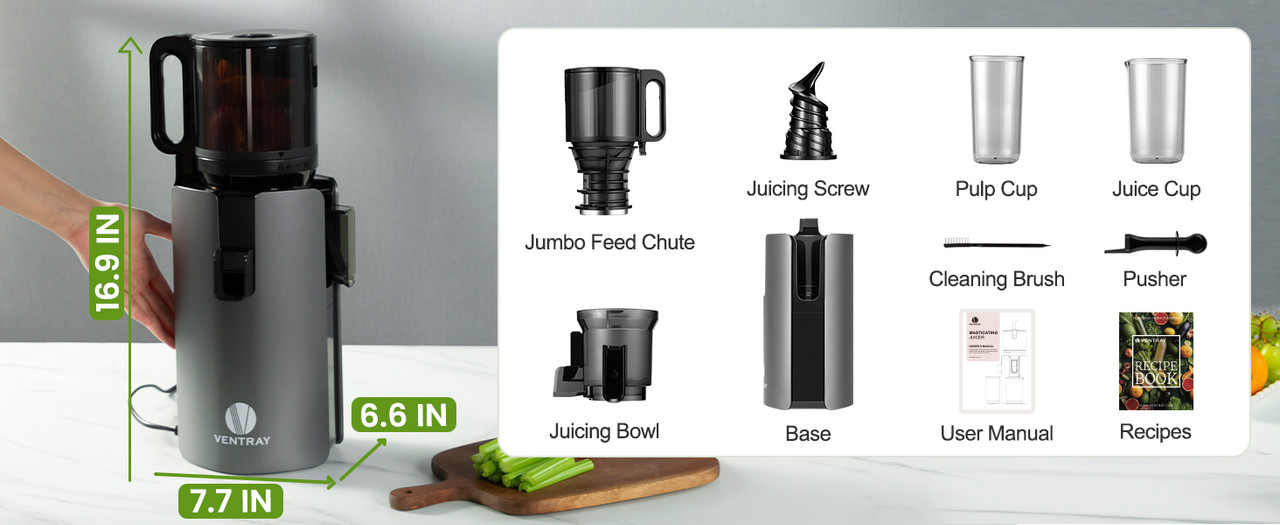
- Jumbo Feed Chute: The spot where apples, carrots, or whatever else goes in.
- Juicing Screw: The piece that mashes produce to squeeze out juice.
- Juicing Bowl: Funnels juice to one spout and pulp to another.
- Base: The heavy bottom part with the motor inside.
- Switch: Flips the juicer on, off, or into reverse.
- Juice Cup: Catches the juice coming out.
- Pulp Cup: Grabs the pulpy leftovers.
- Pusher: A tool to nudge produce down the chute.
- Cleaning Brush: Handy for cleanup.
Assembling Method
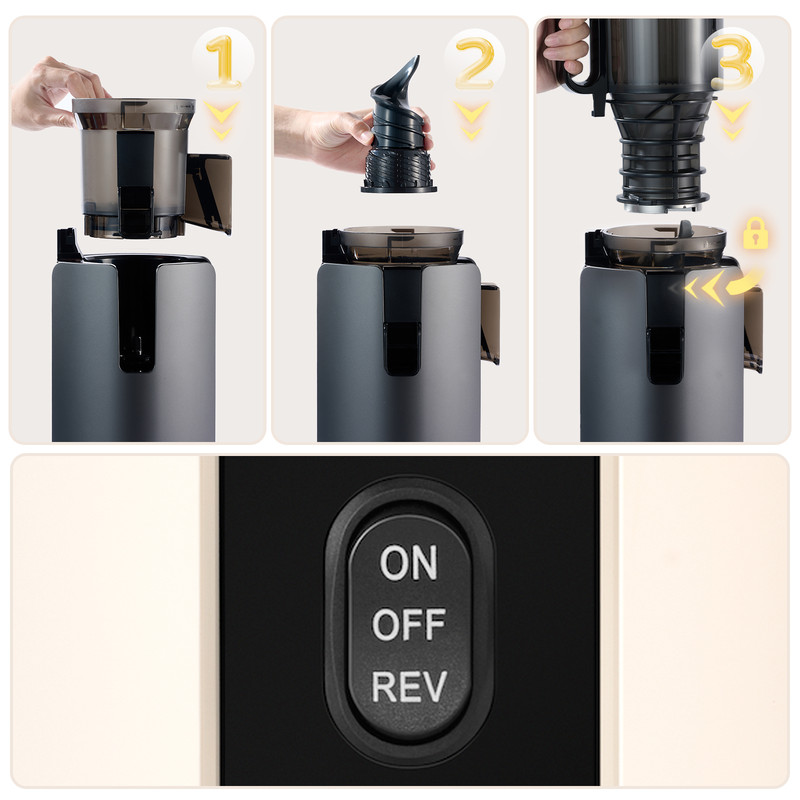
Before touching anything, unplug the juicer and make sure the switch is set to “Off.” Here’s how to get it set up:
- Juicing Bowl Installation: Look for the groove on the base marked with an arrow. Line the juicing bowl up with that groove and push it down until it feels solid.
- Juicing Screw Placement: Pick up the juicing screw and fit its flange into the groove at the bottom of the juicing bowl. Give it a gentle press to lock it in place.
- Jumbo Feed Chute Attachment: Must open the feed chute cover. Set the chute’s base holes over the juicing screw. Find the “▲” mark on the lid and line it up with the 🔓 mark on the juicing bowl. Push down and twist clockwise until the “▲” hits the 🔒 mark, locking it tight.
- Juice and Pulp Cup Placement: Place the juice cup under the juice spout and the pulp cup under the pulp spout.
Operation Instructions
Before juicing, wash all the parts that touch food. Rinse them well and let them air dry or wipe them down.
Button Operation Guide
The juicer has a safety lock, so it won’t turn on unless the lid’s properly closed. Here’s what the buttons are for:
- ON: Press to start juicing. Hit “OFF” to pause.
- REV (Reverse): Hold this if something gets stuck to make the screw spin backward. Let go when it’s clear.
Operating Tips
- Do not juice: sugarcane, ice, hard seeds (e.g., peach pits), whole nuts, and sticky fruits (e.g., bananas).
- Cut high-fiber ingredients like celery, kale, ginger, etc., into small pieces to avoid clogging.
- Use the pusher only to guide stuff in.
- If the juicer overheats, it’ll shut itself off. Flip the switch to “Off” and wait about 10 minutes for it to cool.
Disassembling Method
Before taking it apart, check that the juicer’s off and unplugged. Here’s how to break it down:
- Remove Cups: Grab the juice and pulp cups and set them aside.
- Remove Jumbo Feed Chute: Open the lid on the chute. Twist it counterclockwise until the “▲” mark lines up with the “ ” mark, then pull it off.
- Extract Juicing Screw: Lift out the juicing screw. If it’s not budging, give it a little wiggle.
- Lift Juicing Bowl: Pull the juicing bowl straight up to get it off the base.
Cleaning Tips

- Use the cleaning brush to scrub the juicing screw and bowl, especially the mesh part where pulp likes to cling.
- Rinse all the pieces right after juicing to stop pulp from drying and sticking.
- Make sure everything’s completely dry before putting it away to avoid mold.
These steps should have the Ventray Max 120 Juicer ready to roll. Always make sure it’s off and unplugged when assembling or taking it apart. If produce gets stuck or the machine starts acting up, use the reverse button or let it cool down. For extra help, check out the manual or get in touch with Ventray’s support team. Fresh, homemade juice is just a few minutes away.